> ## Documentation Index
> Fetch the complete documentation index at: https://docs.onyx.app/llms.txt
> Use this file to discover all available pages before exploring further.
# Zoom
> Index the transcripts of Zoom cloud recordings
The Zoom connector indexes the transcript of each cloud-recorded meeting and webinar.
Point it at meeting or webinar IDs, host emails, or a Zoom Group. With **Sync with Zoom**,
each transcript is visible only to the people who can watch the recording in Zoom.
## Before you begin
You need:
* An Onyx administrator account.
* A Zoom account on a **Pro** plan or higher, and a Zoom user who can build apps on the App Marketplace:
the account owner, or an admin with the **Server-to-Server OAuth app** permission.
* **Audio transcript** turned on in Zoom's cloud recording settings.
Zoom only creates a transcript for recordings made after you turn it on.
* The **Webinar** add-on, if you index webinars.
* For [permission sync](#permission-sync), the Onyx Enterprise Edition.
## Create a Zoom app
Sign in at [marketplace.zoom.us](https://marketplace.zoom.us) and open **Develop → Build App**.
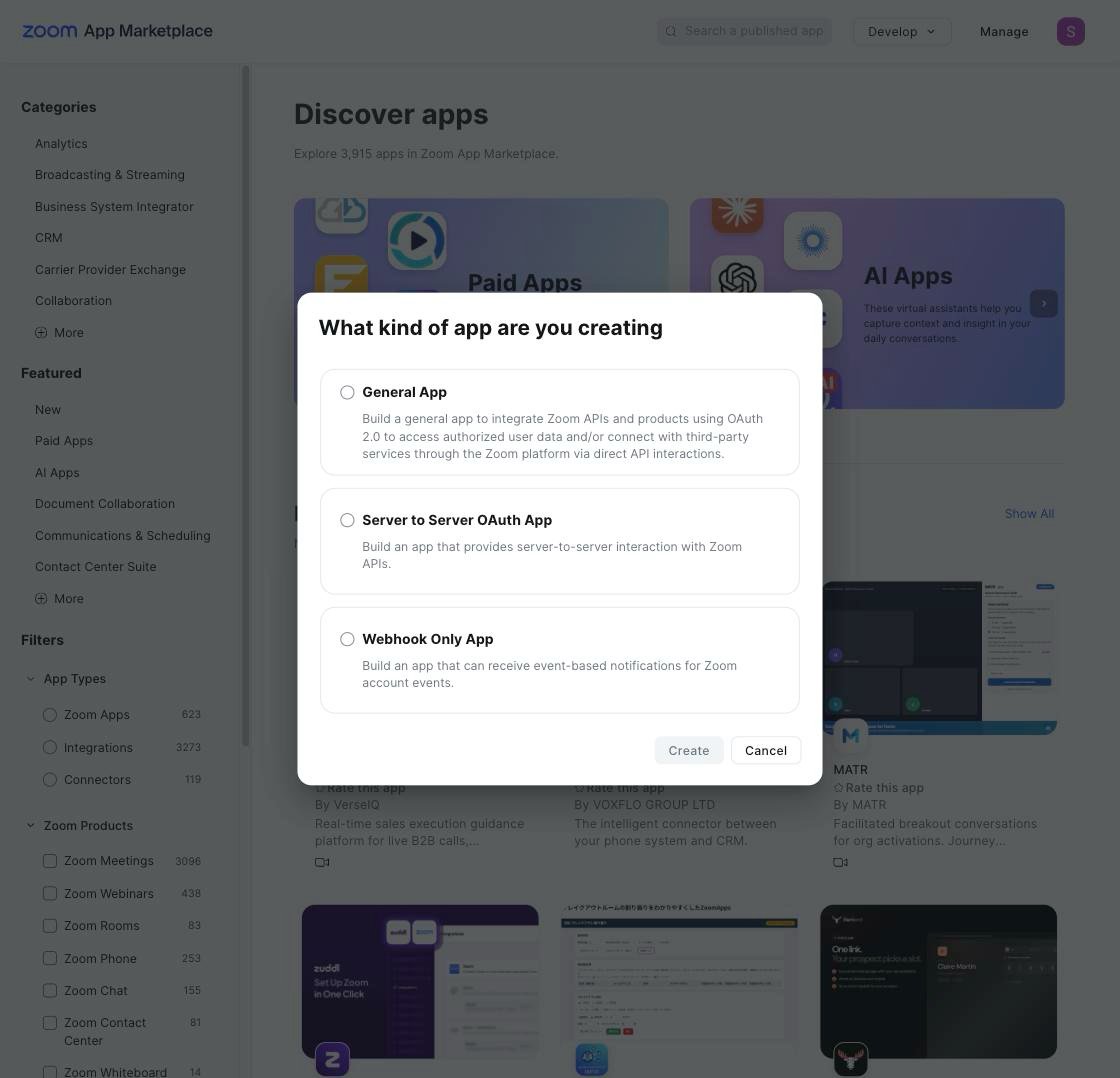
Choose **Server to Server OAuth App** and give it a name, such as "Onyx".
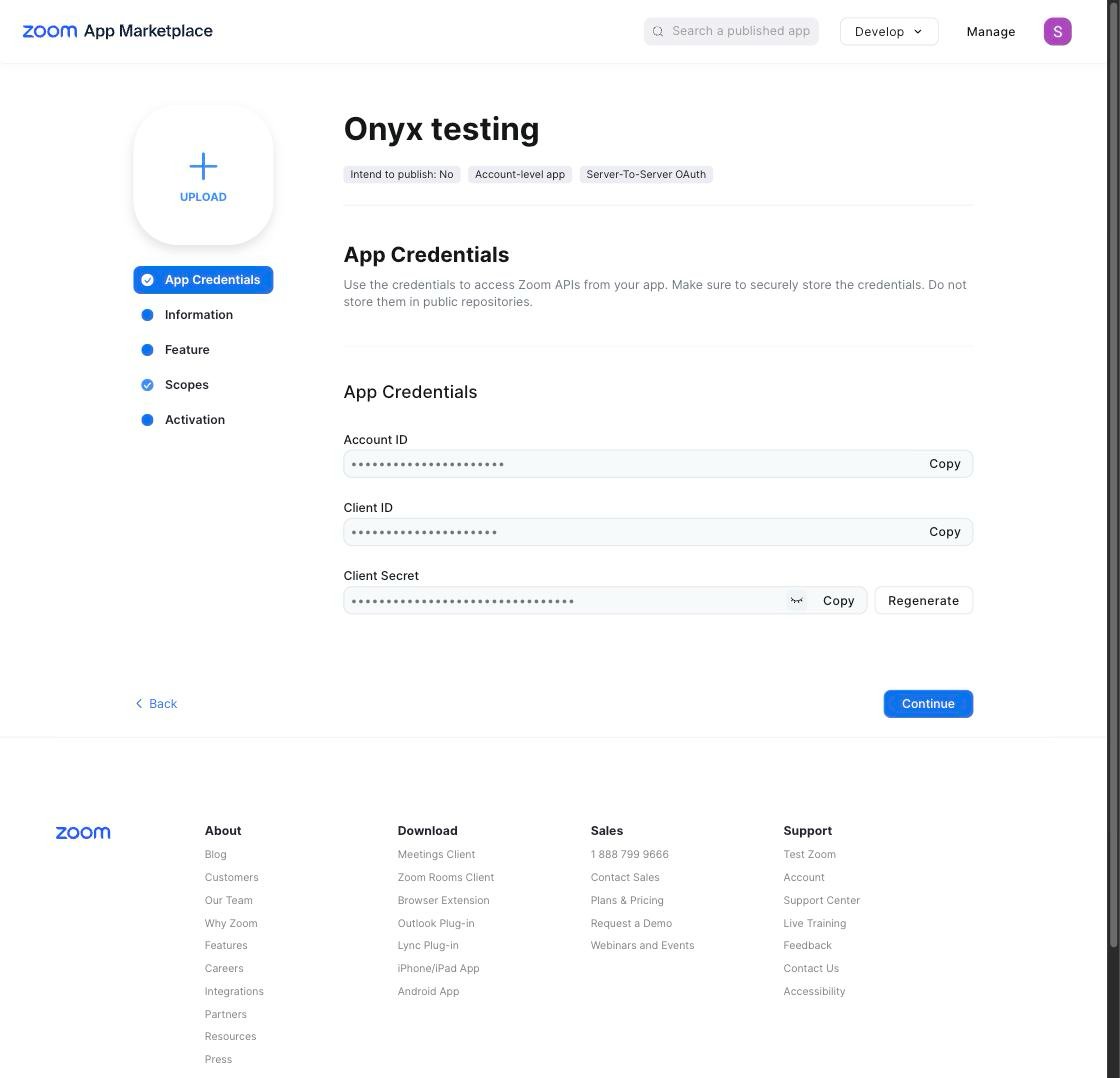
 On **App Credentials**, copy the **Account ID**, **Client ID**, and **Client Secret**. Onyx needs all three.
 Enter a short description, your company name, and a developer contact. Zoom does not activate an app without them.
On **Scopes**, select **Add Scopes**. Search for each scope below, tick it, and select **Done**.
Enter a short description, your company name, and a developer contact. Zoom does not activate an app without them.
On **Scopes**, select **Add Scopes**. Search for each scope below, tick it, and select **Done**.
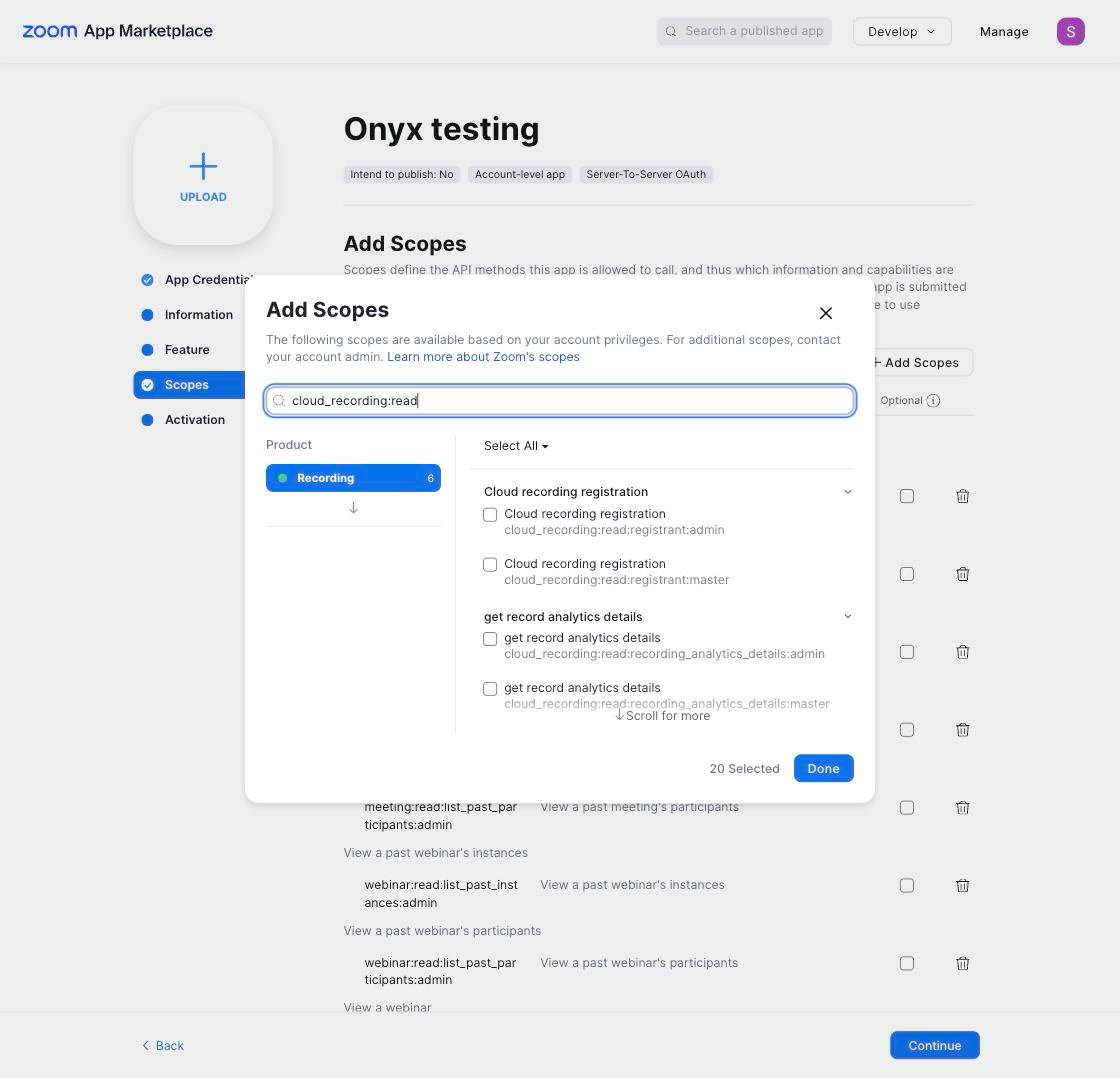 Add these scopes:
* `cloud_recording:read:list_user_recordings:admin`
* `cloud_recording:read:list_recording_files:admin`
* `user:read:list_users:admin`
* `group:read:list_members:admin`
* `meeting:read:meeting:admin`
* `meeting:read:past_meeting:admin`
* `meeting:read:list_past_instances:admin`
* `webinar:read:webinar:admin`
* `webinar:read:list_past_instances:admin`
For **Sync with Zoom**, also add:
* `cloud_recording:read:recording_settings:admin`
* `cloud_recording:read:list_recording_registrants:admin`
* `user:read:user:admin`
* `user:read:settings:admin`
All of them are read-only. Onyx never changes anything in Zoom.
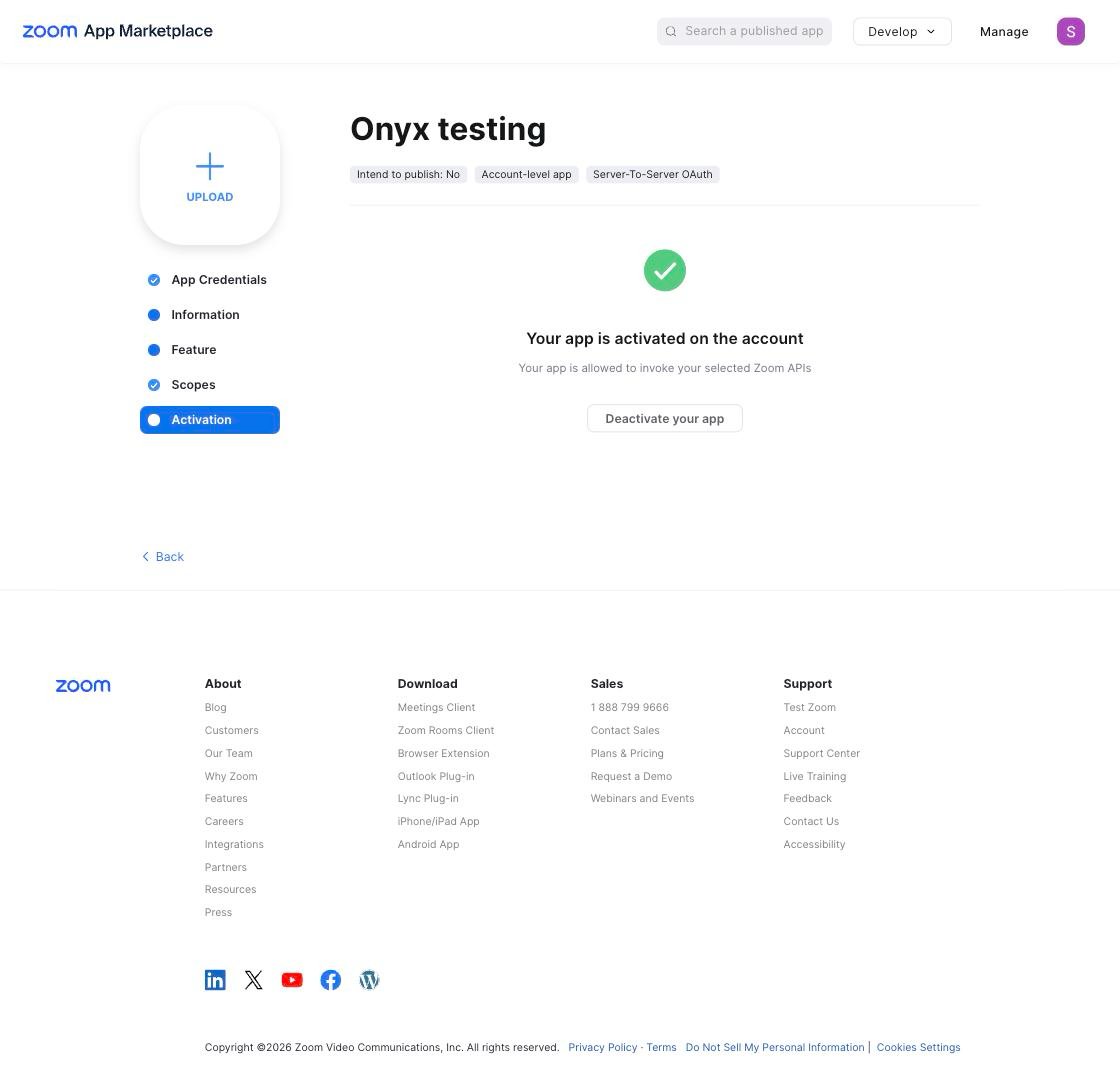
On **Activation**, select **Activate your app**.
Add these scopes:
* `cloud_recording:read:list_user_recordings:admin`
* `cloud_recording:read:list_recording_files:admin`
* `user:read:list_users:admin`
* `group:read:list_members:admin`
* `meeting:read:meeting:admin`
* `meeting:read:past_meeting:admin`
* `meeting:read:list_past_instances:admin`
* `webinar:read:webinar:admin`
* `webinar:read:list_past_instances:admin`
For **Sync with Zoom**, also add:
* `cloud_recording:read:recording_settings:admin`
* `cloud_recording:read:list_recording_registrants:admin`
* `user:read:user:admin`
* `user:read:settings:admin`
All of them are read-only. Onyx never changes anything in Zoom.
On **Activation**, select **Activate your app**.
 ## Configure the connector in Onyx
Go to **Admin Panel → Add Connector** and select **Zoom** under **Meetings**.
Under **Zoom Plan**, choose `pro` on a Pro account, or `business_plus` on Business, Education, Enterprise,
or Partner. This sets how fast Onyx may call Zoom.
Under **Authentication Account**, select **New Zoom Account**. Enter the **Zoom Account ID**, **Zoom Client ID**,
and **Zoom Client Secret** from your Zoom app, then select **Create**.
## Configure the connector in Onyx
Go to **Admin Panel → Add Connector** and select **Zoom** under **Meetings**.
Under **Zoom Plan**, choose `pro` on a Pro account, or `business_plus` on Business, Education, Enterprise,
or Partner. This sets how fast Onyx may call Zoom.
Under **Authentication Account**, select **New Zoom Account**. Enter the **Zoom Account ID**, **Zoom Client ID**,
and **Zoom Client Secret** from your Zoom app, then select **Create**.
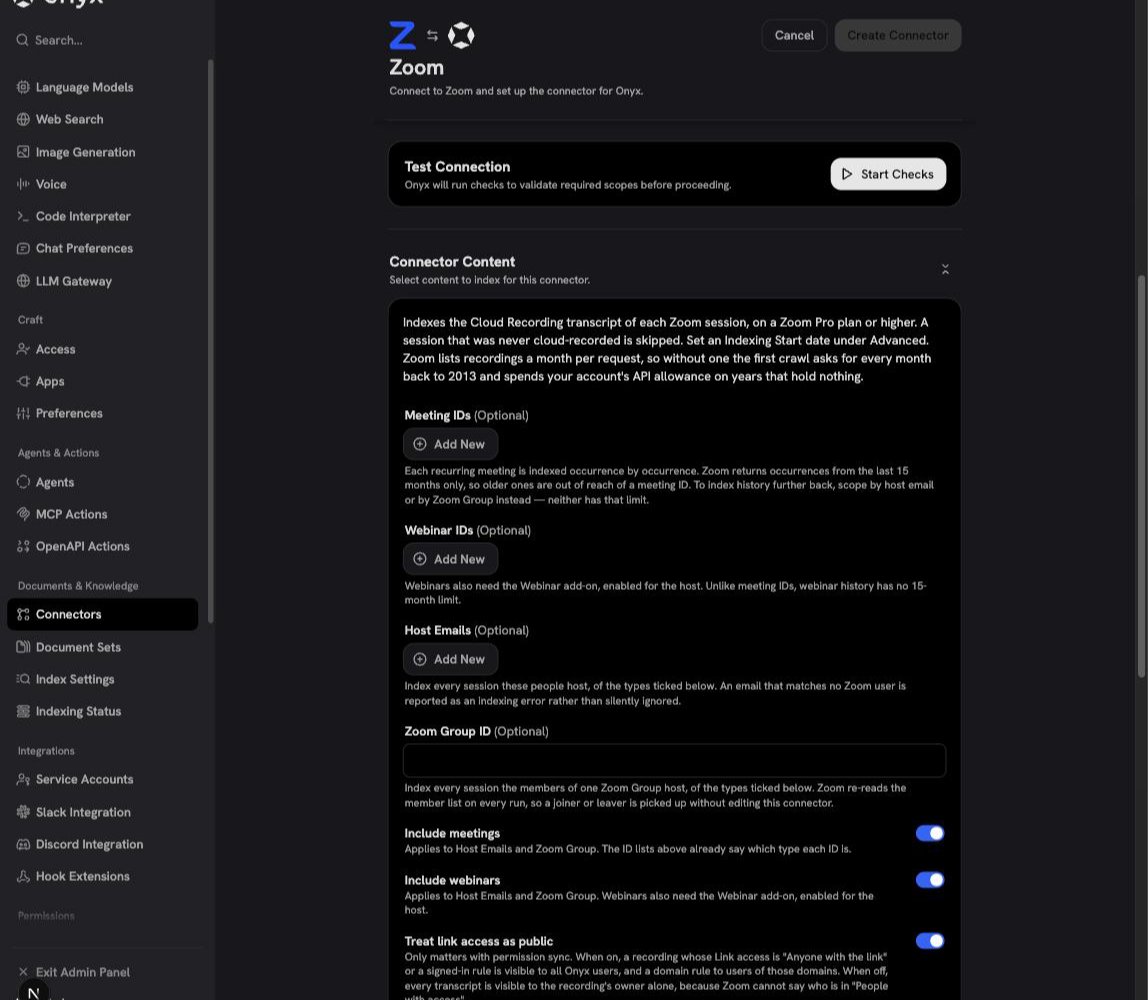
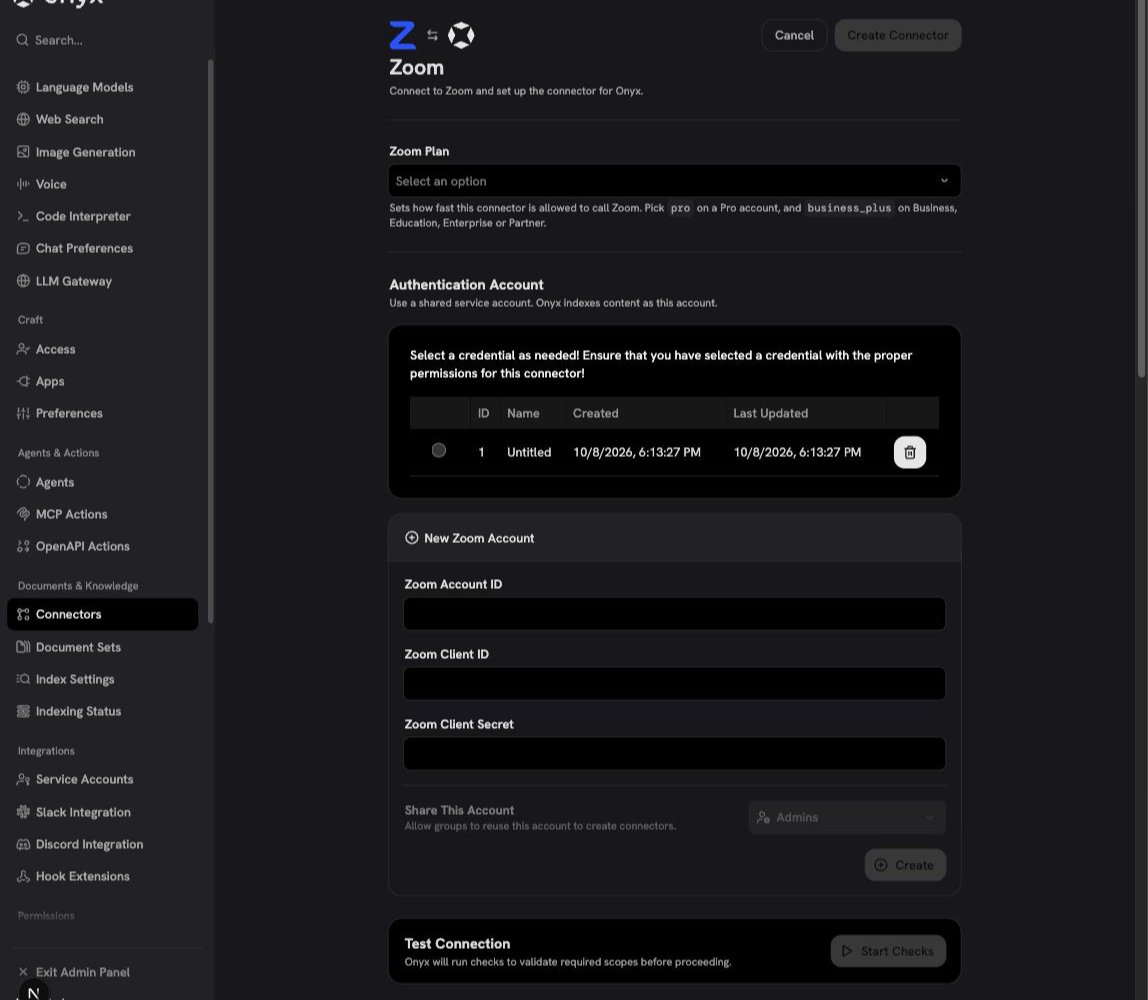 Select **Start Checks**. Onyx checks the credential and the scopes against Zoom and reports anything Zoom refuses.
Under **Connector Content**, fill in any of these:
* **Meeting IDs** and **Webinar IDs**: the numbers from the session's invitation, one per entry.
* **Host Emails**: every recording these people host.
* **Zoom Group ID**: every recording the group's members host.
Find the ID in **User Management → Groups** in the Zoom web portal.
Turn off **Include meetings** or **Include webinars** to leave one session type out.
Select **Start Checks**. Onyx checks the credential and the scopes against Zoom and reports anything Zoom refuses.
Under **Connector Content**, fill in any of these:
* **Meeting IDs** and **Webinar IDs**: the numbers from the session's invitation, one per entry.
* **Host Emails**: every recording these people host.
* **Zoom Group ID**: every recording the group's members host.
Find the ID in **User Management → Groups** in the Zoom web portal.
Turn off **Include meetings** or **Include webinars** to leave one session type out.
 Under **Connector Settings**, name the connector and set **Document Access**:
* **Everyone in Your Organization**: every Onyx user can see every transcript.
* **Specific Groups**: only the Onyx groups you name.
* **Sync with Zoom**: each transcript is visible to the people who can watch the recording in Zoom.
See [Permission sync](#permission-sync).
Under **Connector Settings**, name the connector and set **Document Access**:
* **Everyone in Your Organization**: every Onyx user can see every transcript.
* **Specific Groups**: only the Onyx groups you name.
* **Sync with Zoom**: each transcript is visible to the people who can watch the recording in Zoom.
See [Permission sync](#permission-sync).
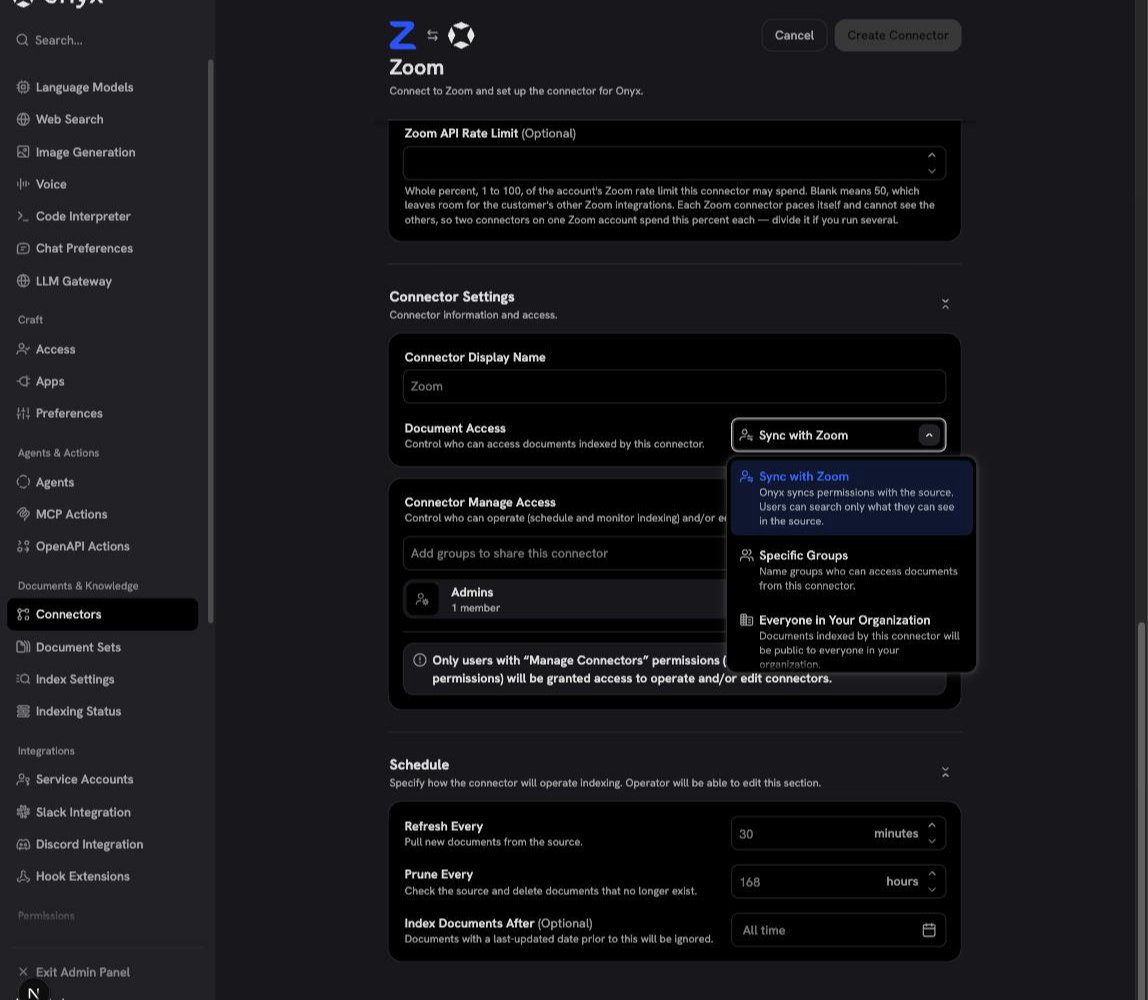 Under **Schedule**, set **Index Documents After**. Without a date, the first run reads your whole recording history,
which can take a long time. Then select **Create Connector**.
## Permission sync
With **Sync with Zoom**,
Onyx reads each recording's **Link access** setting in Zoom and grants the transcript to the same people.
The recording's owner can always see it.
Under **Schedule**, set **Index Documents After**. Without a date, the first run reads your whole recording history,
which can take a long time. Then select **Create Connector**.
## Permission sync
With **Sync with Zoom**,
Onyx reads each recording's **Link access** setting in Zoom and grants the transcript to the same people.
The recording's owner can always see it.
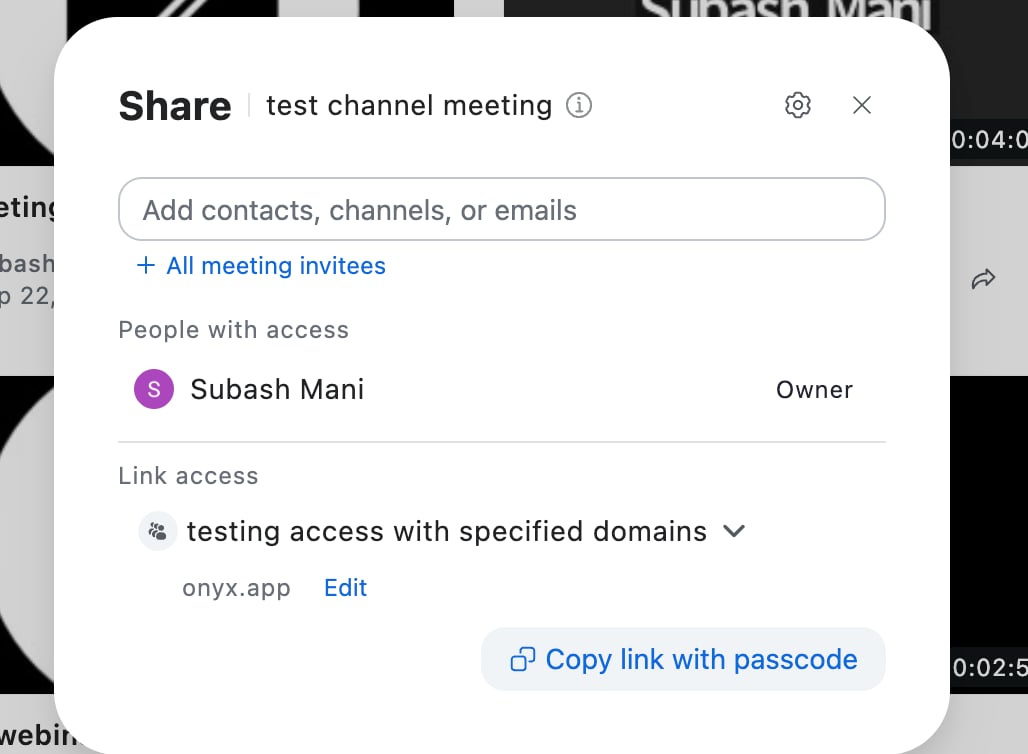 | Link access in Zoom | Who can see the transcript in Onyx |
| - | - |
| Private to me | The owner |
| Only people with access | The owner. Zoom's API does not share that list |
| Signed-in users in my account | Everyone |
| Signed-in users from specific domains | Users with an email address in those domains |
| Anyone with the link | Everyone |
People who registered to watch a recording can see its transcript in every case.
Onyx rereads the settings every 6 hours.
To limit every transcript to its owner instead of **Everyone**,
turn off **Treat link access as public** in the connector settings.
## Troubleshooting
The error says Zoom refused to issue a token. Either the app is not activated,
or one of the three credentials is wrong. Activate the app on its **Activation** tab, then copy the Account ID,
Client ID, and Client Secret again.
The error names the scope Zoom denied. Add that scope on the app's **Scopes** tab, then run the check again.
The host has no Webinar add-on, so Zoom refuses every webinar request. Assign the add-on in Zoom,
or turn off **Include webinars**.
Onyx found no active Zoom user with that email. Check the spelling, and check that the user is still active in Zoom.
A deactivated or deleted user does not match.
The recording has no audio transcript, or Zoom is still processing it.
Turn **Audio transcript** on in Zoom's recording settings; only recordings made after that get a transcript.
The recording uses **Only people with access**. Zoom's API does not share that list, so Onyx grants the owner only.
Share the recording with your account or a domain instead,
or set the connector's **Document Access** to **Everyone in Your Organization**.
This documentation is built and hosted on [Mintlify](https://mintlify.com), a developer documentation platform.
| Link access in Zoom | Who can see the transcript in Onyx |
| - | - |
| Private to me | The owner |
| Only people with access | The owner. Zoom's API does not share that list |
| Signed-in users in my account | Everyone |
| Signed-in users from specific domains | Users with an email address in those domains |
| Anyone with the link | Everyone |
People who registered to watch a recording can see its transcript in every case.
Onyx rereads the settings every 6 hours.
To limit every transcript to its owner instead of **Everyone**,
turn off **Treat link access as public** in the connector settings.
## Troubleshooting
The error says Zoom refused to issue a token. Either the app is not activated,
or one of the three credentials is wrong. Activate the app on its **Activation** tab, then copy the Account ID,
Client ID, and Client Secret again.
The error names the scope Zoom denied. Add that scope on the app's **Scopes** tab, then run the check again.
The host has no Webinar add-on, so Zoom refuses every webinar request. Assign the add-on in Zoom,
or turn off **Include webinars**.
Onyx found no active Zoom user with that email. Check the spelling, and check that the user is still active in Zoom.
A deactivated or deleted user does not match.
The recording has no audio transcript, or Zoom is still processing it.
Turn **Audio transcript** on in Zoom's recording settings; only recordings made after that get a transcript.
The recording uses **Only people with access**. Zoom's API does not share that list, so Onyx grants the owner only.
Share the recording with your account or a domain instead,
or set the connector's **Document Access** to **Everyone in Your Organization**.
This documentation is built and hosted on [Mintlify](https://mintlify.com), a developer documentation platform.