

This guide covers Onyx as an MCP server, giving external clients access to Onyx search.
To give Onyx Agents tools from another MCP server, see MCP Actions.
Before you connect
- Ask your administrator for your Onyx MCP URL, such as
https://onyx.example.com/mcp/. - Sign in with your own Onyx account in the workspace whose documents you want to search.
- Your account needs Search (
read:search) and Create User Access Token (create:user_api_keys) permissions to approve an app. - Your administrator must enable the MCP server. Self-hosted instances need HTTPS for OAuth, with loopback HTTP supported for local development.
- Use a client that supports remote Streamable HTTP MCP servers and OAuth.
onyx.example.com as a placeholder. Replace it with your Onyx web domain.
Use the same URL consistently in your client configuration.
Connect your AI tools
Use your Onyx MCP URL in the setup for your client. Complete Onyx sign-in and approval when prompted.Codex
Add Onyx and sign in
Run these commands in your terminal, replacing the example domain:/mcp and check that Onyx is connected. Send the test prompt
to confirm a search succeeds.
Configure with TOML
As an alternative tocodex mcp add, add the following to ~/.codex/config.toml:
codex mcp login onyx after saving. Keep one mcp_servers.onyx table in the file. If Onyx already exists,
update its URL instead of adding another table.
The desktop app, CLI, and IDE extension share configuration on the same Codex host.
See OpenAI’s MCP guide for configuration options.
Claude Code
Add Onyx for your user account
/mcp, select Onyx, and choose Authenticate. Complete the browser approval.
Check /mcp again and send the test prompt.
Current releases also support authentication directly from the terminal:
claude mcp list to inspect configured servers.
See Claude Code’s MCP documentation for authentication and configuration scopes.
Share the configuration with a project
For a team repository, put the endpoint in.mcp.json at the project root:
Claude Desktop
Use a remote custom connector:- Open Customize > Connectors.
- Select + Add > Add custom connector.
- Name it Onyx and enter
https://onyx.example.com/mcp/with your domain. - Continue through authentication settings. Choose sign-in and either Claude’s published OAuth identity or automatic registration. Onyx supports both.
- Add the connector and complete Onyx sign-in when prompted.
- Enable Onyx through the conversation’s + > Connectors menu and send the test prompt.
Claude Desktop remote connectors connect from Anthropic’s cloud.
Your server must be reachable from that infrastructure, even if your laptop can reach it through a VPN.
The desktop JSON configuration for local processes is a separate setup mechanism.
ChatGPT desktop
- Open Settings > MCP servers and select Add server.
- Name it Onyx and choose Streamable HTTP.
- Enter
https://onyx.example.com/mcp/with your domain. - Save, then select Restart.
- Select Authenticate for Onyx and complete the browser sign-in and approval.
- Enter
/mcpin the composer to inspect connected servers, then send the test prompt.
~/.codex/config.toml. See OpenAI’s MCP guide
for the current desktop controls.
ChatGPT on the web
ChatGPT web uses hosted MCP tools through plugins. It does not read your local Codex configuration. Adding Onyx in the desktop app therefore does not configure it on the web. Consult OpenAI’s MCP guide for the web connection model and your workspace’s plugin availability.Sign in and approve access
1
Add your Onyx MCP URL
Configure the URL in your client using the client setup instructions.
Choose OAuth or the client’s authenticate action. Leave bearer-token headers out of an OAuth configuration.
2
Sign in to Onyx
The client opens your browser. Sign in using your normal Onyx sign-in method if needed.
Approval uses a regular user account. An API key or service account cannot approve an OAuth connection.
3
Review the connection
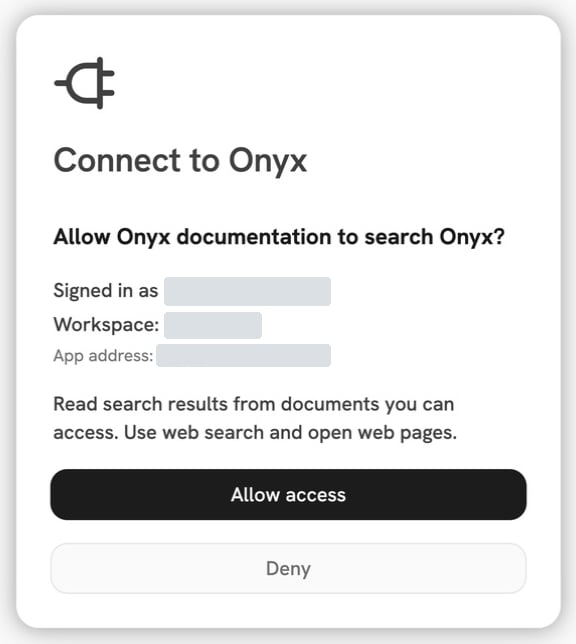
Onyx shows Connect to Onyx and asks whether to allow the app to search Onyx. Check the app name,
signed-in account, workspace, and app address before choosing Allow access.
Choose Deny to return to your client without granting access.
4
Return to your client
The client completes sign-in and stores its credentials. Confirm that the Onyx tools appear, then try a search.
A configured server alone does not prove that authentication and search work.
Test the connection
Copy this prompt into your client:search_indexed_documents. Results should include document titles, source links,
and retrieved content. An empty result can be a valid search response; try a document you know you can access in Onyx.
Permissions and data access
An OAuth connection receives theread:search scope. It can search your accessible documents,
read the search metadata resources, search the public web, and open web pages. It cannot create API keys,
approve other apps, or use unrelated Onyx APIs.
The permission to create user access tokens is a prerequisite for approval, not an extra scope granted to the app.
Your document permissions and workspace policies still apply.
Connecting an app does not give it access to documents you cannot read. Workspace membership, account access,
billing restrictions, and usage limits can affect requests after connection.
Your external AI client receives the retrieved content so it can use it in its response.
Choose a client and account that your organization permits to receive that information. Onyx retrieves content;
the external client writes the final answer.
Connection expiry
After the authorization expires, sign in and approve access again. Refresh tokens rotate after use.
Reusing an already consumed refresh token revokes that authorization,
so a client that loses or reuses its refresh credentials may need you to reconnect.
If a client registers without refresh support, its authorization lasts only for the access token’s lifetime.
Manage connected apps
1
Open connected apps
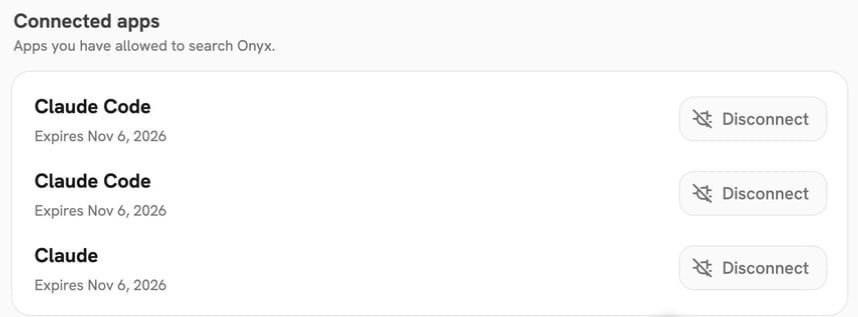
Open Settings > Accounts & Access > Connected apps in Onyx. Find the app you want to disconnect.
The list shows the app name and authorization expiry.
2
Disconnect the app
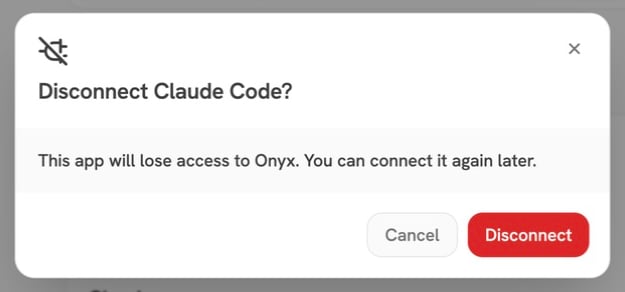
Select Disconnect and confirm. Onyx revokes that connection’s access and refresh tokens.
The app can no longer use that authorization to access Onyx.
3
Remove the client configuration if needed
Remove the server or connector from your AI client if you no longer want it configured.
Removing a local configuration and revoking an Onyx authorization are separate actions.
Use a personal access token instead
OAuth is the usual setup for interactive clients. If your environment requires a bearer token, create a personal access token withread:search access.
Keep the token in a local environment variable. For Bash,
this reads it without echoing it or putting the value in the command history:
Codex token configuration
Use this table instead of the OAuth-only table:codex from the shell where ONYX_TOKEN is exported.
A desktop app launched separately may not inherit that shell’s environment.
Claude Code token configuration
Use this.mcp.json entry instead of the OAuth-only entry:
claude from the shell where the variable is exported.
Claude Code expands the environment variable when it loads the configuration.
Remove the Authorization header to switch back to OAuth.
Disconnect or change accounts
To clear Codex’s saved OAuth credentials:.mcp.json instead.
Desktop connector settings also provide disconnect or removal controls.
Removing a client configuration and revoking an Onyx authorization are separate operations.
Use Onyx’s connected app controls to revoke the grant.
Revoke a personal access token in Onyx if you used token authentication. To change accounts,
clear the client’s saved authentication and reconnect with the intended Onyx account.
Prompts you can use
Replace names and dates with values from your workspace. Ask for source links so you can check the material behind an answer.Find a procedure
Search a document set
Use an Onyx agent’s knowledge scope
agent with document_set_names in the same search.
Find recently updated documents
Compare workspace guidance with public documentation
Tool reference
search_indexed_documents
Search the knowledge indexed in Onyx. The search includes query expansion, retrieval, document selection, and context expansion.time_cutoff can result in a search without a date restriction.
The response has a results array. Each result includes title, url, source_type, content, and updated_at.
Results are ordered by relevance. content contains retrieved document text,
which can be a selected chunk rather than the entire document. There is no limit parameter for this tool.
search_web
Search public web content. Availability depends on your Onyx web-search configuration.results and query. Results include page titles, URLs, and snippets.
Use open_urls for page text when a snippet is insufficient.
open_urls
Retrieve text from web pages. This tool does not provide a way to bypass a site’s sign-in or Onyx document permissions.results array with fetched page text and metadata.
Resource reference
Clients that support MCP resources can read these JSON resources to discover search filters:
Resource support varies by client. A resource lookup is not required before searching:
named filters are resolved on the search call and return an error when they cannot be resolved.
Troubleshooting
For connection commands, see Connect your AI tools.