

Before you begin
You need:- An Onyx administrator account.
- A Zoom account on a Pro plan or higher, and a Zoom user who can build apps on the App Marketplace: the account owner, or an admin with the Server-to-Server OAuth app permission.
- Audio transcript turned on in Zoom’s cloud recording settings. Zoom only creates a transcript for recordings made after you turn it on.
- The Webinar add-on, if you index webinars.
- For permission sync, the Onyx Enterprise Edition.
Create a Zoom app
1
Build a Server-to-Server OAuth app
Sign in at marketplace.zoom.us and open Develop → Build App.
Choose Server to Server OAuth App and give it a name, such as “Onyx”.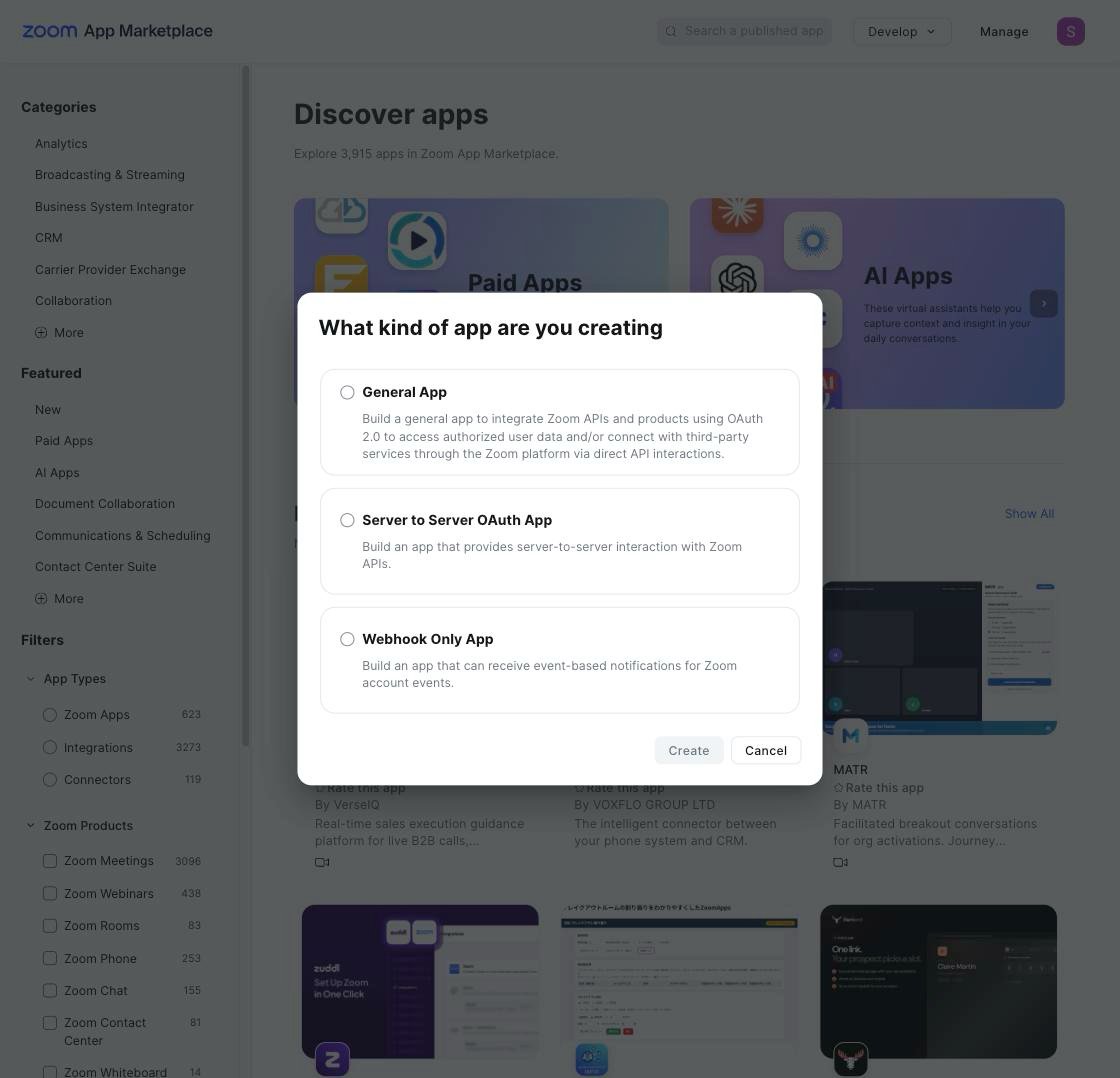
2
Copy the credentials
On App Credentials, copy the Account ID, Client ID, and Client Secret. Onyx needs all three.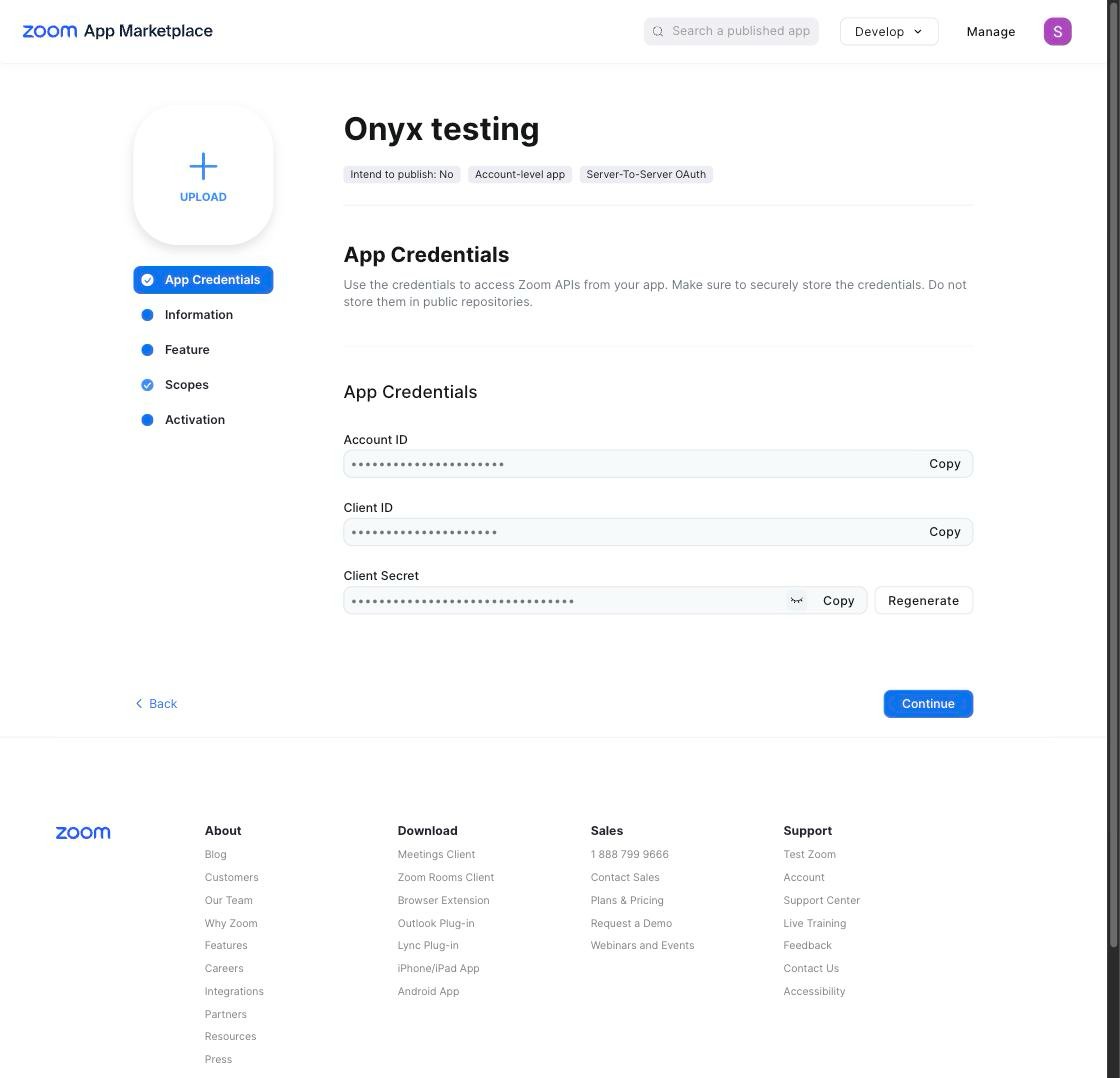
3
Fill in the Information tab
Enter a short description, your company name, and a developer contact. Zoom does not activate an app without them.
4
Add the scopes
On Scopes, select Add Scopes. Search for each scope below, tick it, and select Done.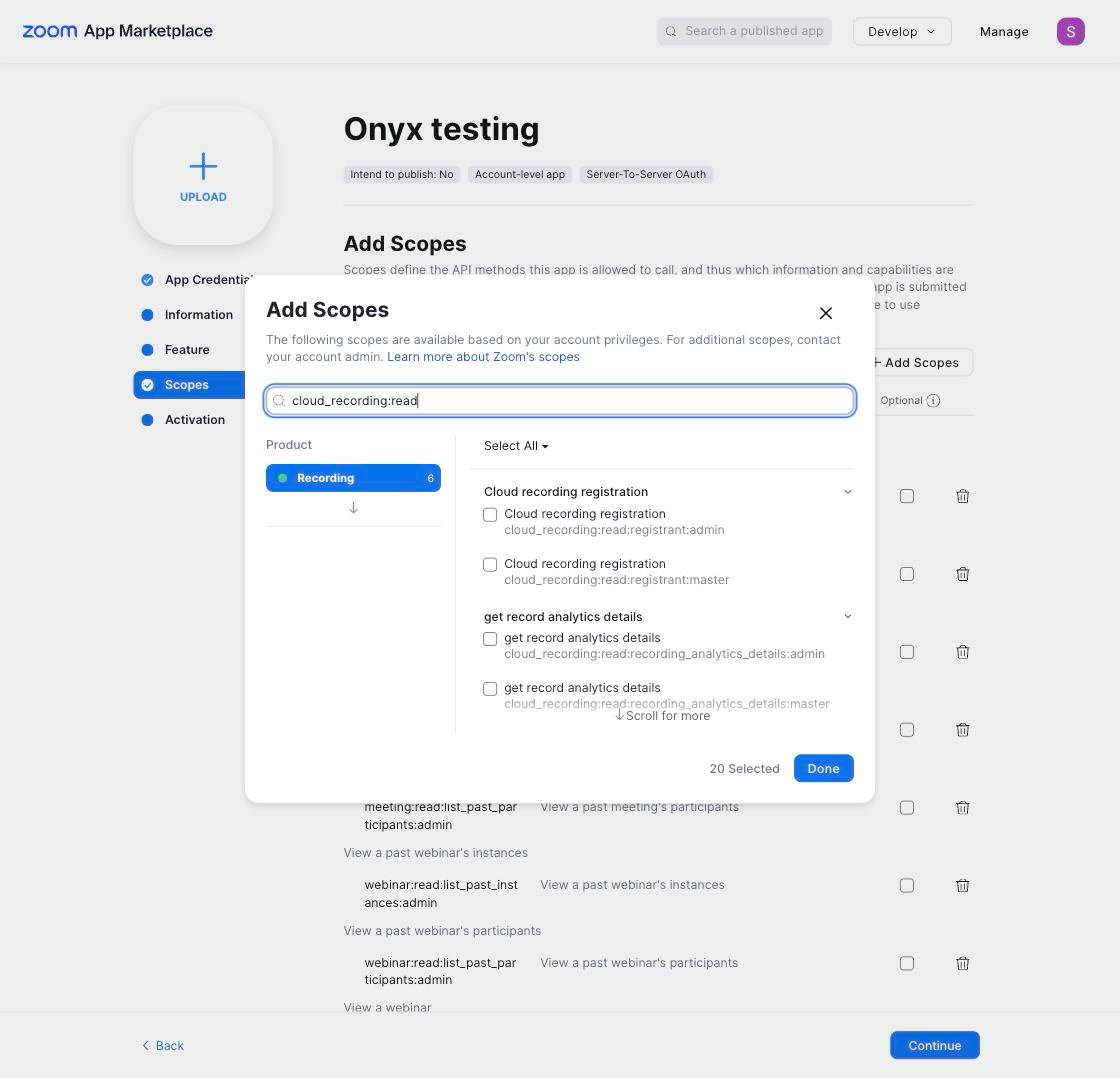
cloud_recording:read:list_user_recordings:admincloud_recording:read:list_recording_files:adminuser:read:list_users:admingroup:read:list_members:adminmeeting:read:meeting:adminmeeting:read:past_meeting:adminmeeting:read:list_past_instances:adminwebinar:read:webinar:adminwebinar:read:list_past_instances:admin
cloud_recording:read:recording_settings:admincloud_recording:read:list_recording_registrants:adminuser:read:user:adminuser:read:settings:admin
5
Activate the app
On Activation, select Activate your app.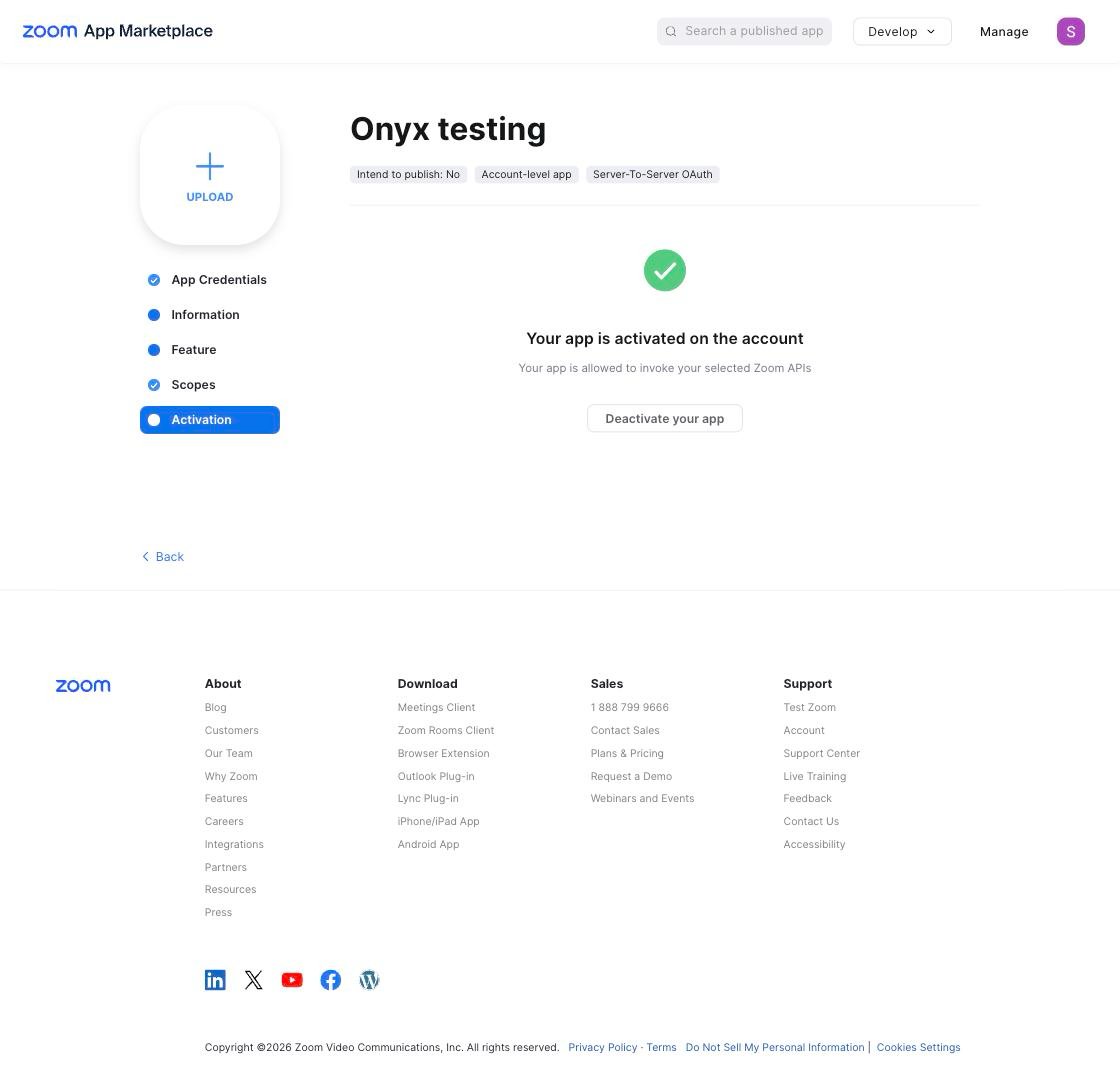
Configure the connector in Onyx
1
Open the Zoom connector
Go to Admin Panel → Add Connector and select Zoom under Meetings.
2
Pick the Zoom plan
Under Zoom Plan, choose
pro on a Pro account, or business_plus on Business, Education, Enterprise,
or Partner. This sets how fast Onyx may call Zoom.3
Add the credential
Under Authentication Account, select New Zoom Account. Enter the Zoom Account ID, Zoom Client ID,
and Zoom Client Secret from your Zoom app, then select Create.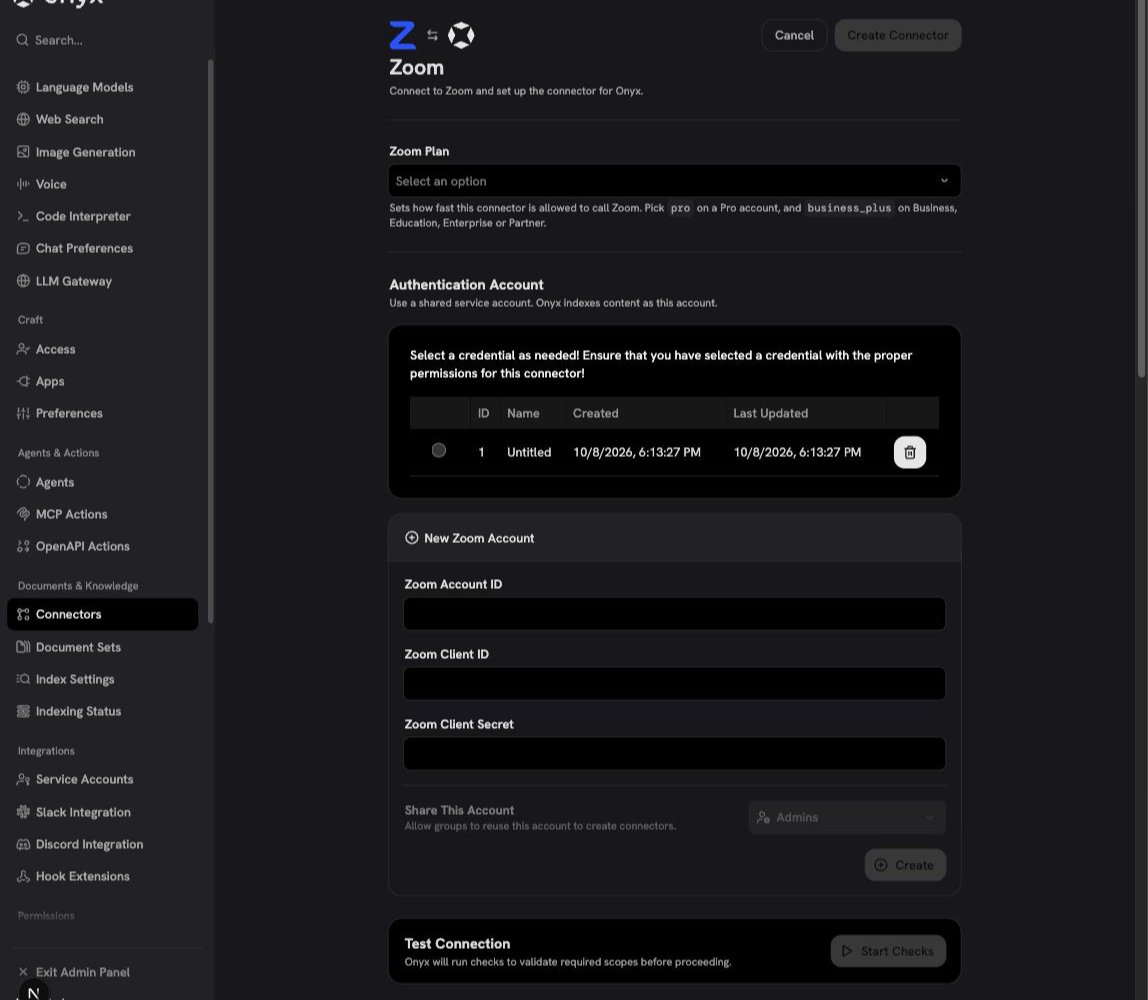
4
Test the connection
Select Start Checks. Onyx checks the credential and the scopes against Zoom and reports anything Zoom refuses.
5
Choose what to index
Under Connector Content, fill in any of these: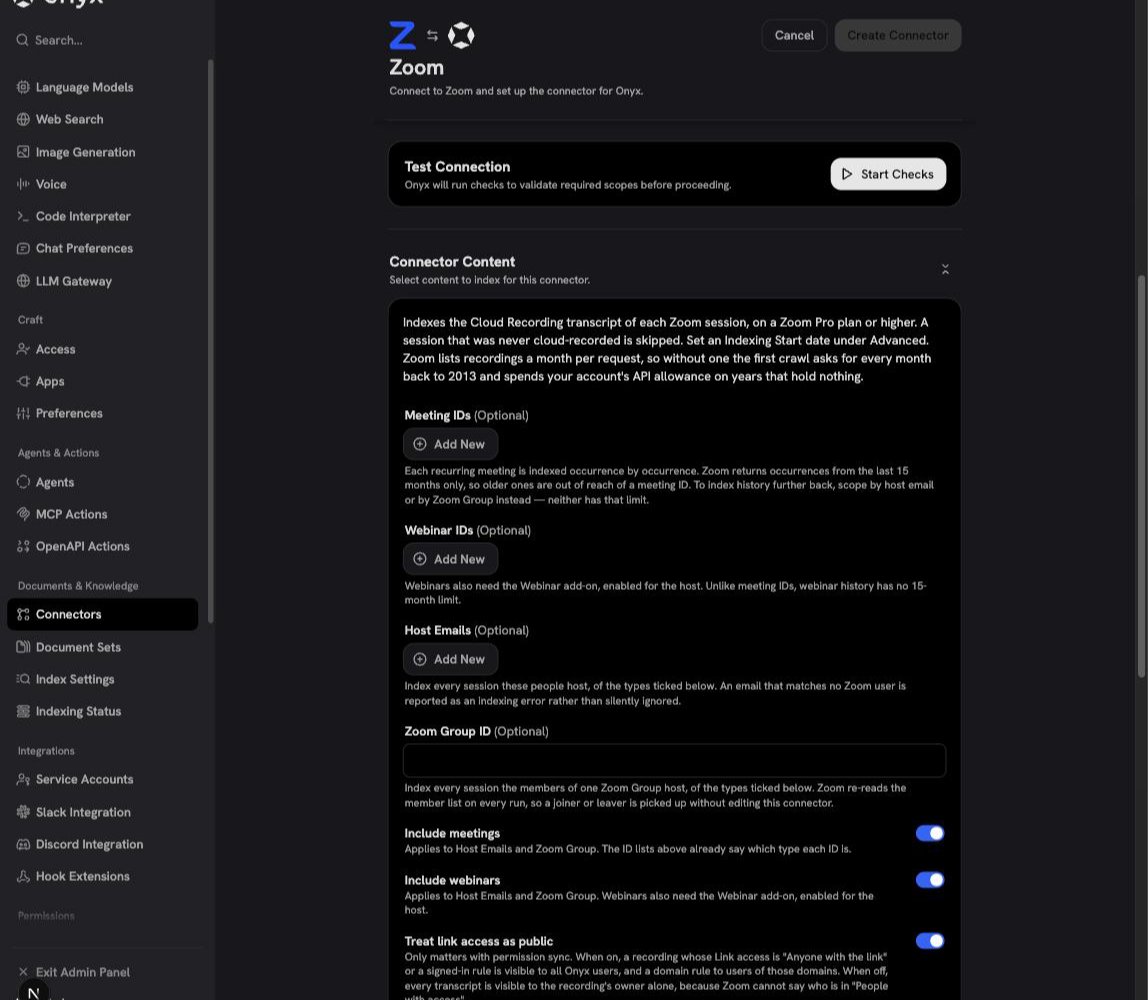
- Meeting IDs and Webinar IDs: the numbers from the session’s invitation, one per entry.
- Host Emails: every recording these people host.
- Zoom Group ID: every recording the group’s members host. Find the ID in User Management → Groups in the Zoom web portal.
6
Choose who can see the transcripts
Under Connector Settings, name the connector and set Document Access: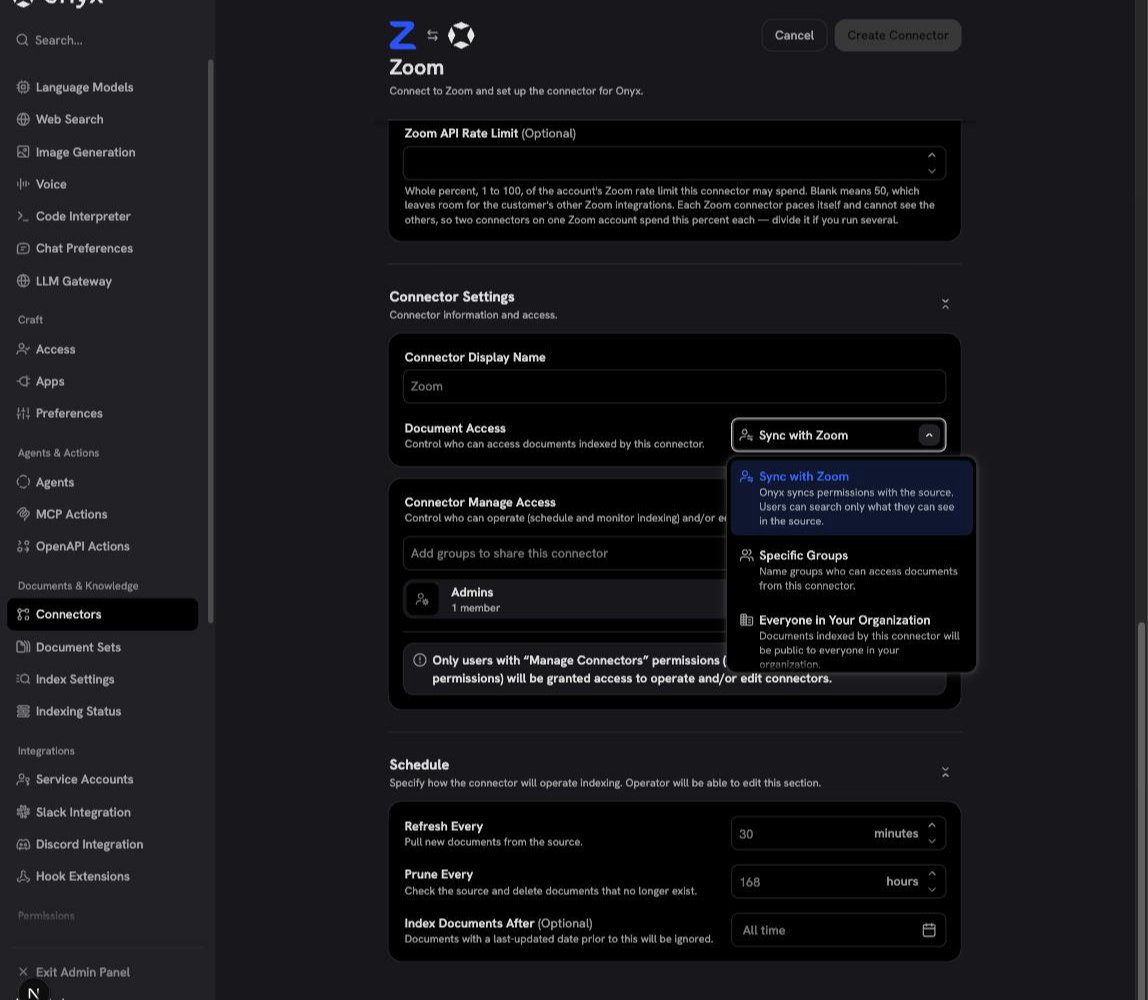
- Everyone in Your Organization: every Onyx user can see every transcript.
- Specific Groups: only the Onyx groups you name.
- Sync with Zoom: each transcript is visible to the people who can watch the recording in Zoom. See Permission sync.
7
Set a start date and create
Under Schedule, set Index Documents After. Without a date, the first run reads your whole recording history,
which can take a long time. Then select Create Connector.
Permission sync
With Sync with Zoom, Onyx reads each recording’s Link access setting in Zoom and grants the transcript to the same people. The recording’s owner can always see it.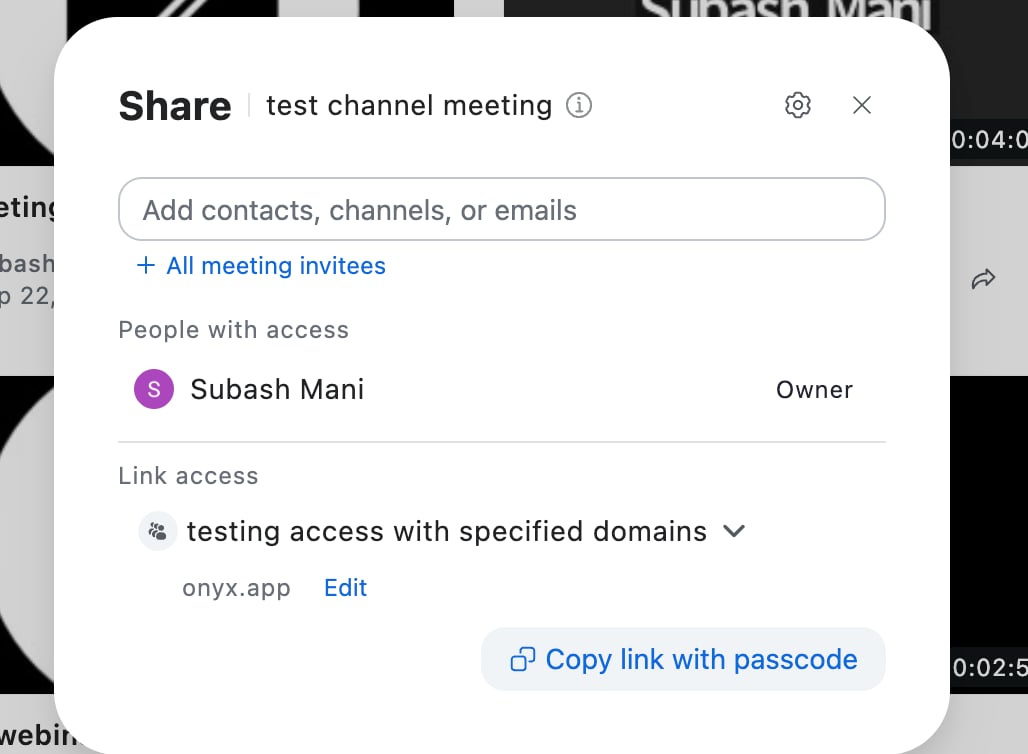
People who registered to watch a recording can see its transcript in every case.
Onyx rereads the settings every 6 hours.
To limit every transcript to its owner instead of Everyone,
turn off Treat link access as public in the connector settings.
Troubleshooting
Onyx cannot connect to Zoom
Onyx cannot connect to Zoom
The error says Zoom refused to issue a token. Either the app is not activated,
or one of the three credentials is wrong. Activate the app on its Activation tab, then copy the Account ID,
Client ID, and Client Secret again.
The connection check reports a missing scope
The connection check reports a missing scope
The error names the scope Zoom denied. Add that scope on the app’s Scopes tab, then run the check again.
Webinars are not indexed
Webinars are not indexed
The host has no Webinar add-on, so Zoom refuses every webinar request. Assign the add-on in Zoom,
or turn off Include webinars.
A host email is reported as an indexing error
A host email is reported as an indexing error
Onyx found no active Zoom user with that email. Check the spelling, and check that the user is still active in Zoom.
A deactivated or deleted user does not match.
A recording is in Zoom but not in Onyx
A recording is in Zoom but not in Onyx
The recording has no audio transcript, or Zoom is still processing it.
Turn Audio transcript on in Zoom’s recording settings; only recordings made after that get a transcript.